A backyard pool brings joy, but it also brings risk. Drowning is one of the leading causes of accidental death in children under five. Most of these tragedies happen in residential pools—and often when fencing is missing or inadequate.
To help prevent these accidents, pool fencing guidelines exist to protect families and reduce hazards. Whether you’re installing a new pool or evaluating your current setup, taking the right safety measures is essential.
This guide breaks down everything you need to know about pool fencing: when it’s needed, how tall it should be, how to secure gates, prevent climbing, and what to do when the house borders the pool area.
When a Pool Fence Is Needed
A safety barrier is needed for any pool holding 24 inches or more of water. This includes in-ground pools, spas, and hot tubs without locking covers. Above-ground or portable pools also need fencing if the pool walls are less than 48 inches high. However, if an above-ground pool has sides that are 48 inches or taller, the pool walls may serve as the barrier. But this is only acceptable if all access points—like ladders or stairs—are either removable or protected by a secure gate and enclosure. If those conditions aren’t met, a separate fence around the pool or yard is still needed.
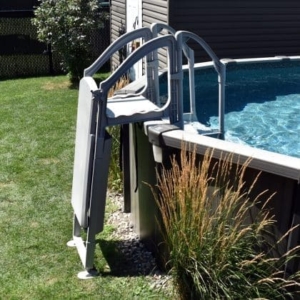 Above-Ground Pools: Safety Features for Ladders and Decks
For above-ground pools with walls at least 48 inches tall, the ladder or step system must be properly secured. One option is using a removable ladder that can be lifted or locked upright when the pool is not in use. If the ladder is fixed or built into a deck, it must be enclosed by a barrier with a self-closing, self-latching gate that opens away from the pool. Any deck attached to the pool must also have a fence and gate that meets the same safety standards.
Always check that wall height remains consistent around the entire pool. Pay attention to sloped areas of the yard that may reduce the effective height. Also, keep ladders, steps, and other access points secure, and remove or protect anything nearby that a child could use to climb over the pool wall.
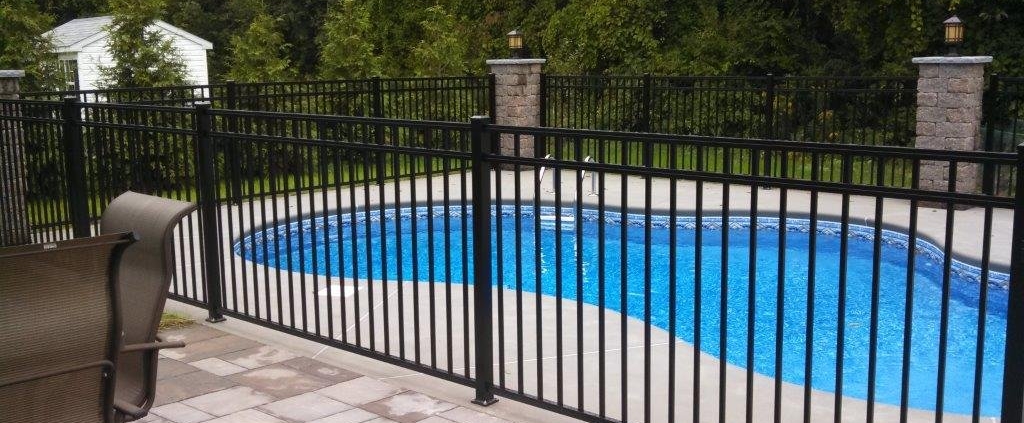
Fence Height and Barrier Recommendations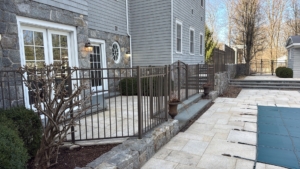
Fences should be at least 48 inches high from ground level. The fence should fully enclose the pool and keep it separate from the yard and house. Openings in the fence should be small enough to prevent a child from passing through—no more than four inches wide between vertical slats. For chain-link fences, diamond-shaped openings should be no larger than 1.25 inches unless fitted with inserts that reduce the space.
Climb Hazards and Design Risks
Fences must be designed to prevent climbing. Horizontal rails should be spaced far apart or placed on the inside of the fence to make climbing difficult. Avoid decorative designs or lattice panels that can act as footholds. Even a fence with the correct height can be unsafe if children can use nearby objects to climb over it. Move planters, benches, grills, storage bins, or AC units at least 36 inches away from the fence.
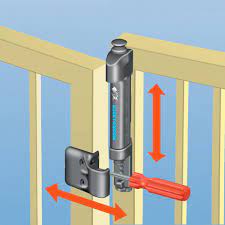 Gate Safety Features
Gates must close and latch automatically. They should open outward, away from the pool area, and the latch should be located at least 54 inches above the ground to be out of reach of small children. It’s important to check gates regularly for signs of rust, loose hinges, or sagging. A gate that doesn’t close and latch properly compromises the safety of the entire pool area.
When the House Is Part of the Pool Barrier
If one wall of the home borders the pool area, any door that opens directly into the pool space must be secured with an alarm. These alarms should sound within seven seconds of the door opening and be loud enough to alert adults in the home—at least 85 decibels. The alarm should reset automatically after 30 seconds and not be something a child can easily turn off. Sliding doors may also need self-closing hardware and locks placed high on the door frame. Pet doors leading into the pool area should be sealed or removed, as they provide another unsafe access point.
Fence Material and Style Considerations
There are many fence options that can offer both safety and style. Aluminum and wrought iron fences with vertical bars are durable and provide visibility. Vinyl fences are a popular choice for privacy but must avoid horizontal rails. Mesh safety fences work well for seasonal pools if they are anchored properly and include a self-latching gate. Tempered glass fences offer a sleek, modern look with clear sight lines to the pool. Chain-link fences should only be used if the openings are small enough, and decorative styles must avoid footholds or wide gaps.
Explore the This Old House guide covering popular fence types, materials, maintenance tips, and cost considerations.
Keep Your Pool Safe
Pool safety begins with a secure barrier. Whether you own an in-ground or above-ground pool, having the right pool fencing, gate, and access protection is essential for keeping children and pets safe. Make sure your fence is tall enough and free from climbable features. Use self-closing, self-latching gates, and install alarms on any door that opens into the pool area. For above-ground pools, secure the ladder or steps with a removable design or an enclosed gate. Remove any objects near the fence that children could use to climb.
If you have any concerns about your pool’s safety setup, schedule a Pool Inspection with an On Point Home Inspections, Certified Advanced Pool Inspector. We’ll help you identify risks and offer solutions that make your pool area safer for everyone.
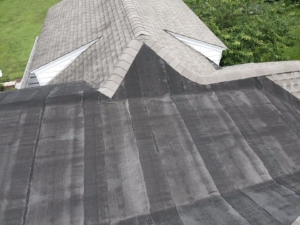
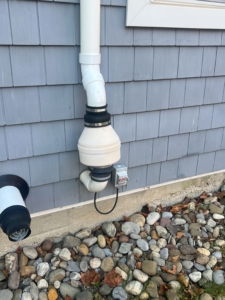
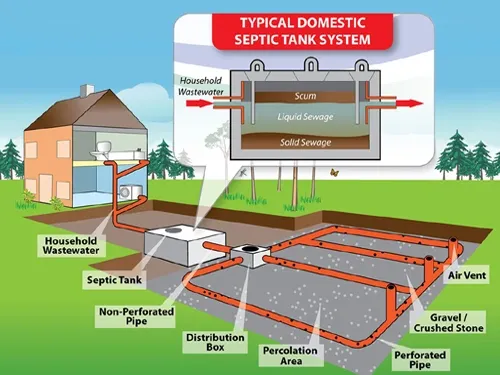
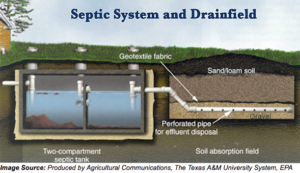
 Understanding Perimeter Drain Systems
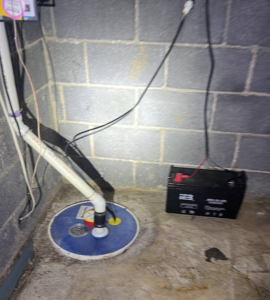
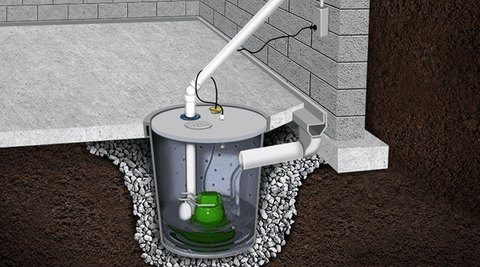
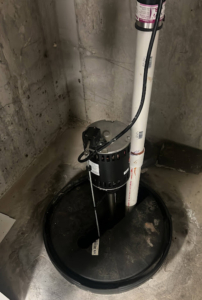
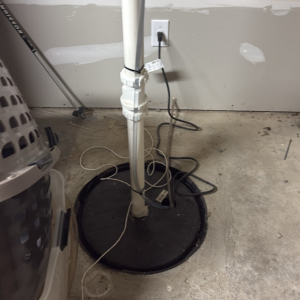
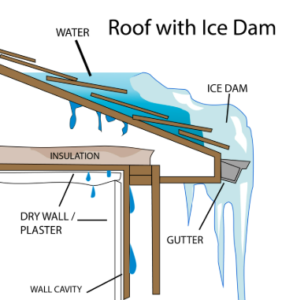
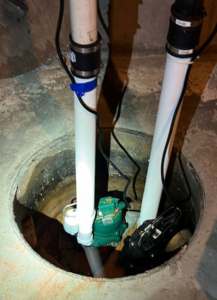 Why Add a Second Sump Pump?
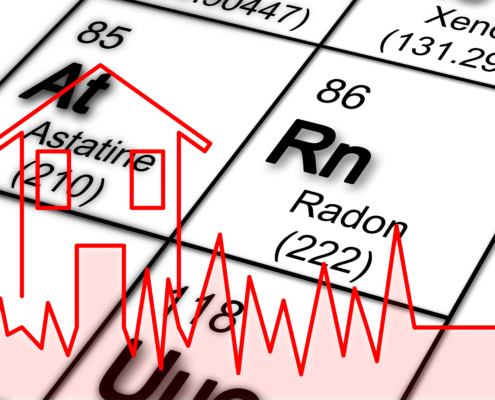
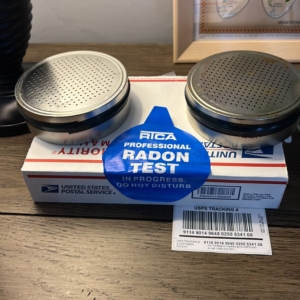 Radon Testing Methods
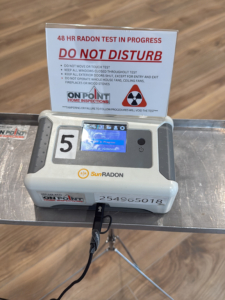
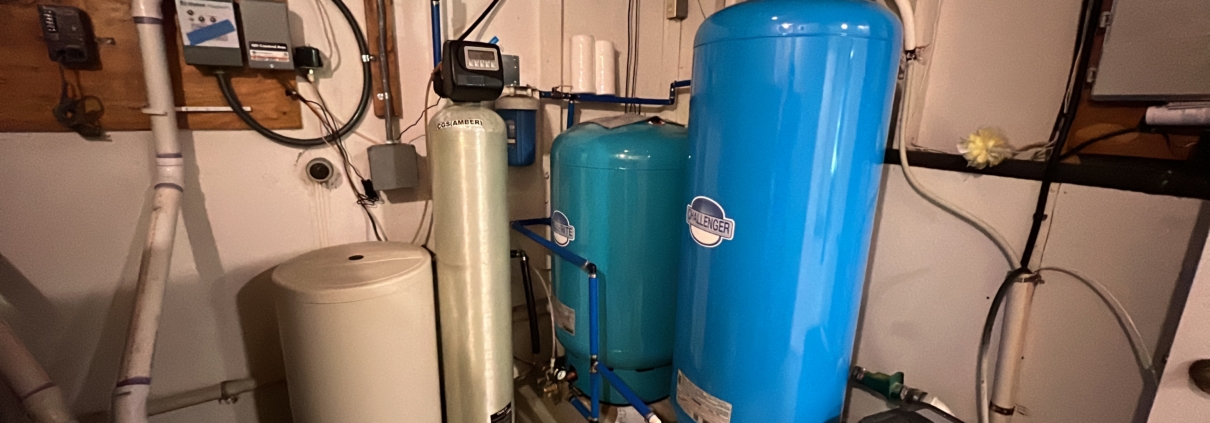
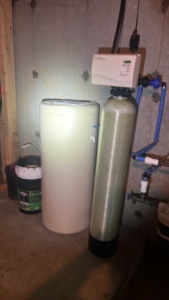
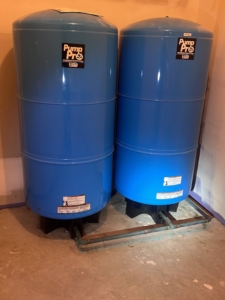 Water storage tanks are essential for homeowners who require additional water capacity. These tanks hold a reserve supply, ensuring a steady flow of water even during high-demand periods. Storage tanks help stabilize pressure, reduce pump cycling, and provide backup water in case of pump failure. Flow rates and water pressure are key factors in well performance. The flow rate, measured in gallons per minute (GPM), indicates how much water the well can supply at a given time. A lower-than-expected flow rate may indicate a problem with the pump or the well’s recharge rate. Water pressure should be consistent throughout the home, typically ranging between 40-60 psi for optimal function.
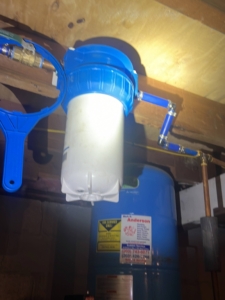

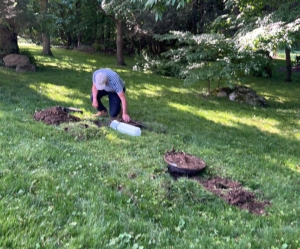
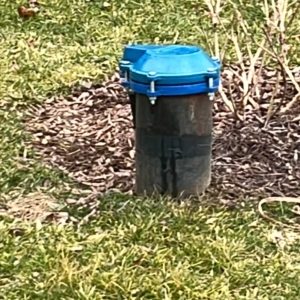
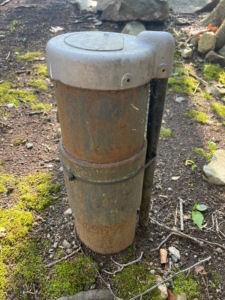
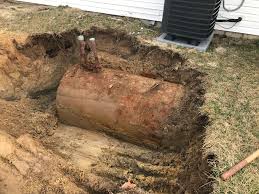
 Several signs may indicate the presence of a buried oil tank. Old fill or vent pipes sticking out of the ground, often near the house, are a common indicator. A petroleum odor or stained soil in the yard could signal a leak. If the home previously used oil heat, there may still be an underground tank. Unexplained depressions or sinking areas in the yard might suggest a deteriorating tank underground. Additionally, abandoned oil tank lines passing through a foundation wall can indicate that an underground tank once existed. Homeowners should carefully inspect their property for any of these clues.
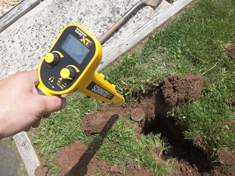
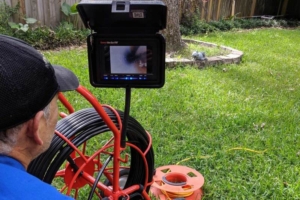 Using a sewer scope camera during a septic inspection provides valuable insights into the condition of your system. A small, waterproof camera is inserted into the pipes to check for blockages, leaks, root intrusions, or signs of damage. This technology helps identify problems early, preventing costly repairs and system failures. It also provides visual confirmation of pipe integrity, ensuring that the septic system is functioning efficiently.