A dry basement isn’t just a comfort. It’s essential to protect your home. One of the best ways to prevent water damage? A sump pump. This post breaks down how sump pumps work, when you need one, and how they tie into basement drain systems.
Why Water in Your Basement Is a Problem
Water in a basement can lead to serious problems like mold growth, rotting wood, foundation damage, musty odors, and ruined belongings. Even small amounts of water can cause major issues over time. If left untreated, the damage could cost thousands to repair. A sump pump helps by removing water before it becomes a threat.
When Do You Need a Sump Pump?
You may need a sump pump if your basement floods during rain, you live in a low-lying area, or your home is near a high water table. Poor exterior drainage, such as gutters that discharge too close to the foundation, can add to the risk. Snow melt, broken plumbing lines, and saturated soil increase water pressure against the foundation, allowing moisture to seep through cracks or rise through the slab. Even homes without past water issues may benefit from a sump pump to avoid future damage.
What Is a Sump Pump?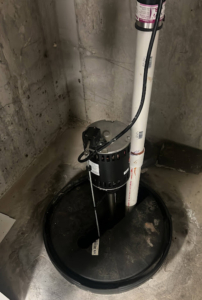
A sump pump is a small device installed in the lowest part of your basement or crawl space. It sits in a pit, known as a sump basin. When water collects in the pit, the pump pushes it out through a discharge pipe. These systems are essential in homes exposed to heavy rain, snow melt, or high groundwater levels.
How a Sump Pump Works
Water may seep through cracks in the foundation walls or rise through the concrete slab. This is often caused by a high water table or poor drainage. Snow melt, heavy rain, or leaking plumbing can worsen the problem.
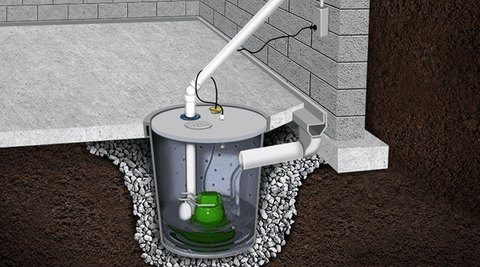
A perimeter drain system collects this water and redirects it to the sump pit. When water reaches a certain level, a float switch activates the pump. The pump then moves the water away from the home. Many systems include automatic switches and alarms for extra protection.
 Understanding Perimeter Drain Systems
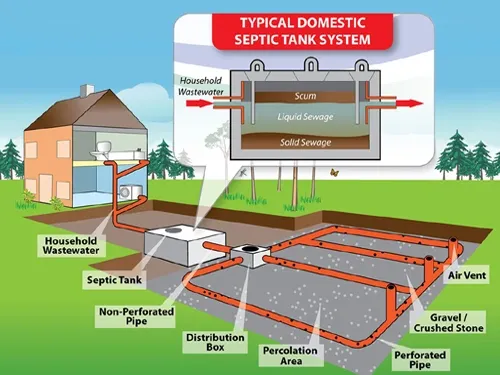
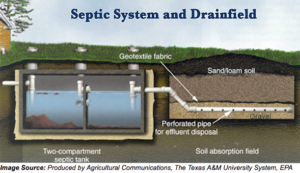
A perimeter drain system manages groundwater using perforated pipes installed around the inside or outside edge of your basement floor. Water enters these pipes and flows to the sump pit, where the pump removes it. These drains are often beneath the floor slab, surrounded by gravel to keep water flowing. Interior systems are easier to retrofit, while exterior systems are more common in new builds.
Where Should a Sump Pump Discharge Water?
The sump pump should discharge water at least 10 feet from your foundation and in a location that slopes away. This distance helps prevent the discharged water from cycling back toward your home and re-entering the basement. Common solutions include dry wells, rain gardens, or storm drains—if allowed by local codes. Never discharge water into a septic system, as it can overload the system and cause health and environmental problems. Also avoid directing water onto sidewalks, into the sewer system, or toward a neighbor’s property. Always check local guidelines.
Components of a Sump Pump System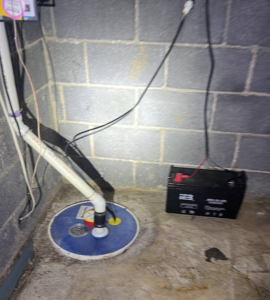
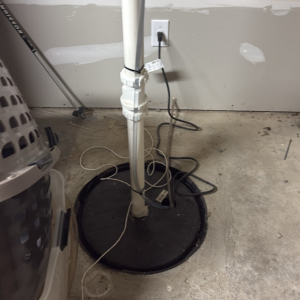
The sump pit, usually 18–24 inches deep, is lined with plastic or concrete. A float switch activates the pump when water rises. A check valve prevents water from flowing back into the pit. The discharge pipe should be solid PVC and properly sloped.
The pump must be plugged into a GFCI receptacle to reduce the risk of electric shock. An airtight lid reduces odors, moisture, and radon gas while protecting kids and pets. Some building codes require sealed lids.
Advanced systems may include alarms, backup float switches, and smart monitors that send phone alerts.
Battery Backup Systems
Power outages often strike during storms—the same time you rely on your sump pump. A battery backup system is designed to keep your pump running when the power goes out. It activates automatically and uses stored battery power to keep removing water from the sump pit. High-end models use long-lasting marine or lithium-ion batteries for extended protection.
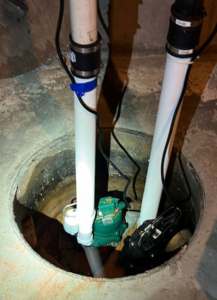 Why Add a Second Sump Pump?
In addition to battery backup, having a second sump pump is a smart move. If the main pump fails due to mechanical issues, clogs, or heavy usage, the secondary pump takes over. This extra layer of protection keeps your basement dry—even during major storms or flooding. It’s an ideal solution in homes with large basements, finished spaces, or high water volumes.
Why the Airtight Lid Matters
A sealed sump pit blocks debris, odors, radon gas, and humidity. It also prevents pests and accidents. Lids with gasket seals and cutouts for wires and pipes improve safety and air quality. In radon-prone areas, they help with mitigation.
Sealing the pit also helps dehumidifiers run more efficiently by reducing moisture in the basement.
Summary
Sump pumps and perimeter drain systems are key to a dry, healthy basement. They collect, redirect, and remove water before it can cause damage. With the right setup, you can avoid costly repairs and enjoy peace of mind.
A reliable sump system with backup power and proper discharge extends your foundation’s life and keeps your basement clean and dry. Whether you’re protecting a finished space or preventing future problems, it’s a wise investment.
For more information on how sump pump systems work, go to This Old House- Dry Basement
**If you are buying a new home or would like a pre-listing inspection for your current home, call On Point Home Inspections. We provide expert inspections, empowering informed home purchases!**

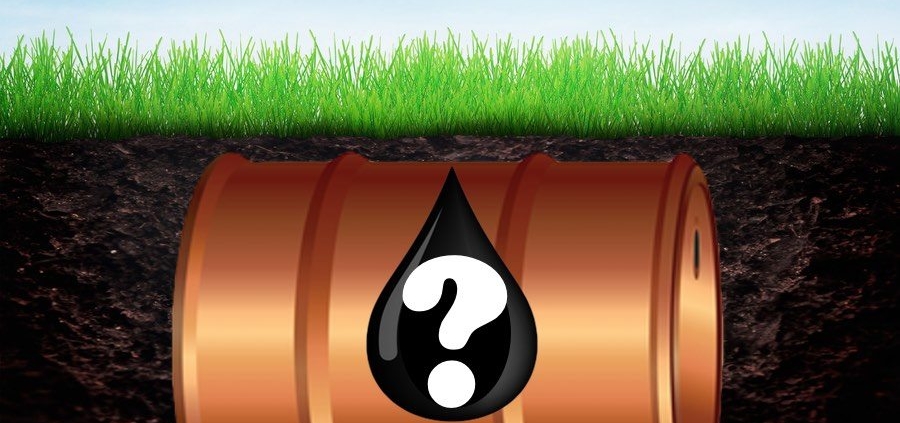
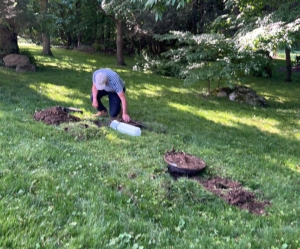
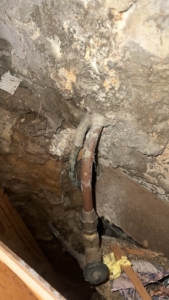 Several signs may indicate the presence of a buried oil tank. Old fill or vent pipes sticking out of the ground, often near the house, are a common indicator. A petroleum odor or stained soil in the yard could signal a leak. If the home previously used oil heat, there may still be an underground tank. Unexplained depressions or sinking areas in the yard might suggest a deteriorating tank underground. Additionally, abandoned oil tank lines passing through a foundation wall can indicate that an underground tank once existed. Homeowners should carefully inspect their property for any of these clues.
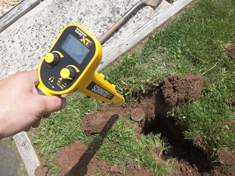
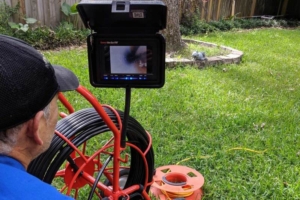 Using a sewer scope camera during a septic inspection provides valuable insights into the condition of your system. A small, waterproof camera is inserted into the pipes to check for blockages, leaks, root intrusions, or signs of damage. This technology helps identify problems early, preventing costly repairs and system failures. It also provides visual confirmation of pipe integrity, ensuring that the septic system is functioning efficiently.